Monday, July 23, 2007
radiator redux
after seeing all of the rust and gunk that was in my radiator and heater hoses, i finally decided to do what i had known i was going to have to do all along: get a whole new radiator. i had already spent time adapting the taurus fan to work with the stock radiator and moving the radiator mounts to clear the water pump, but the old stock radiator was just too crusty to try to make work. i just spent a lot of money on rebuilding the landcruiser, and i didnt want to ruin the engine with inadequate cooling. although a new radiator was going to be more money and more work, when i finally removed the old radiator, i could heard the chunks of rust sloshing around inside, and i knew i had made the right decision.
after tons of research and comparing the pros and cons of various radiator replacements, i decided to go with an oversized aluminum radiator (made by Ron Davis Radiators and sold by Man-a-Fre). i considered a stock replacement copper radiator, but i had heard a lot of people say that they were marginal at best when cooling a V8. i also looked at several other aluminum radiators, including a few drop-in replacements (Man-a-Fre, Be-Cool, and others), but i was looking for something a) a little bigger, b) cross-flow, and c) with a built-in transmission cooler. The Ron Davis/MAF radiator seemed to be just what i was after.
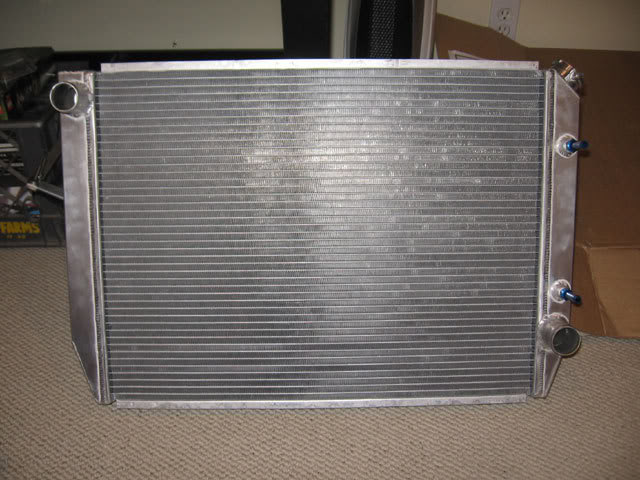
new aluminum radiator with aluminum transmission cooler fittings installed
since i had moved my stock radiator forward a couple of inches, and this new radiator was quite a bit bigger, i was worried about it fitting, but it fit like a glove. i the mounting system that the radiator came with is pretty slick, so installation was really easy. the upper radiator mount also came with some support arms that extend out to the firewall. in order to provide a solid mounting point at the correct angles, i decided to use some heim joints and make some custom brackets.
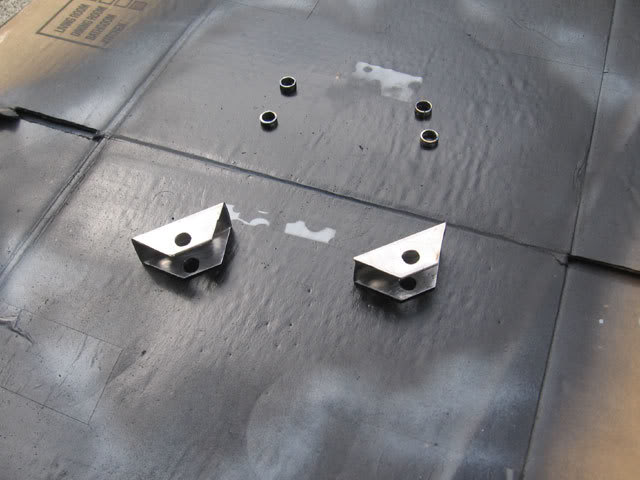
here are the brackets i cut out of some 1" square tubing and the spacers i used to center the heim joint
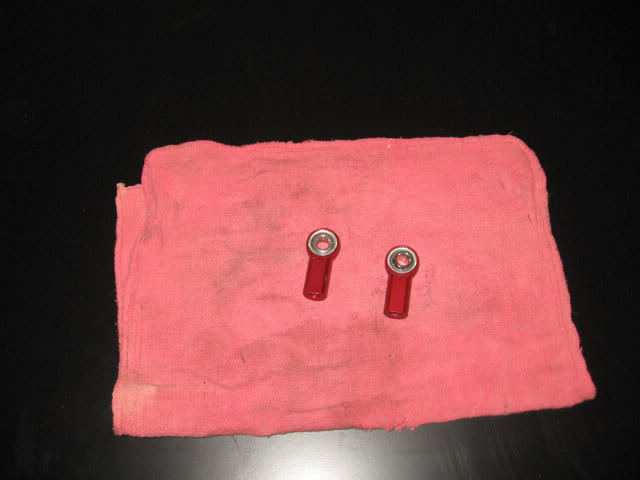
here are the heim joints i used. they are 3/8" with 3/8" female threads (from McMaster-Carr)
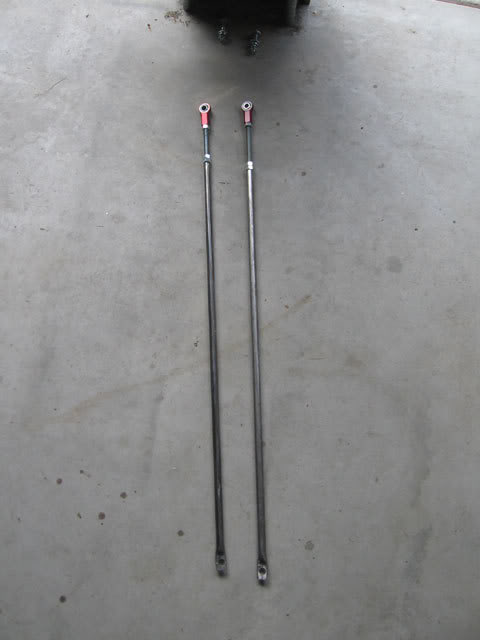
here are the heim joints attached to some threaded rod and to the radiator support arms. by using the threaded rod, the support arms are adjustable in length
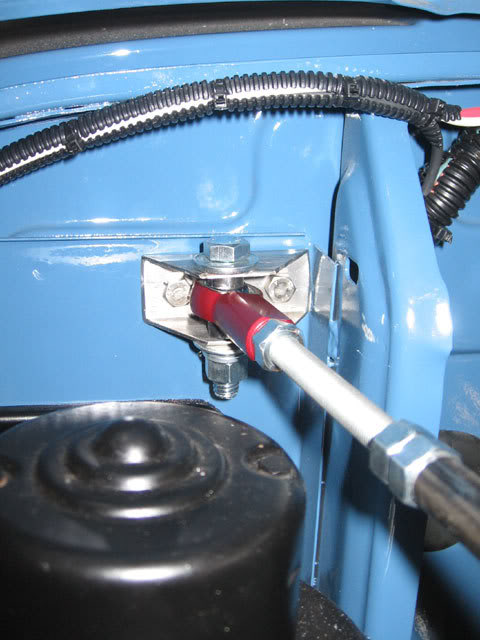
here is a test fitting of the setup. since the heim joint is centered, it is free to move side to side 180° and up and down a total of 24°
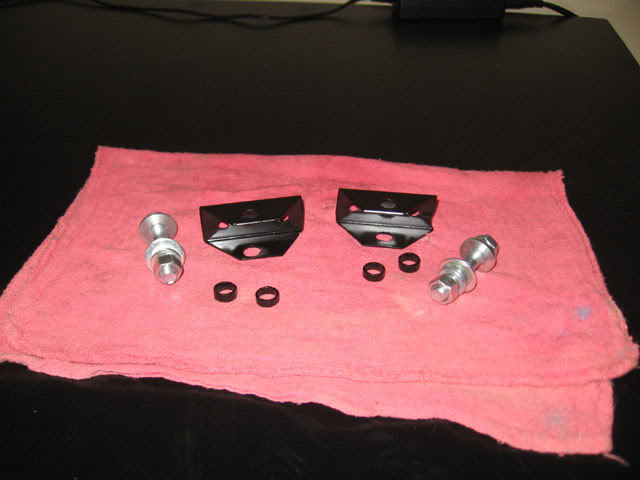
here are the brackets after a quick coat of paint
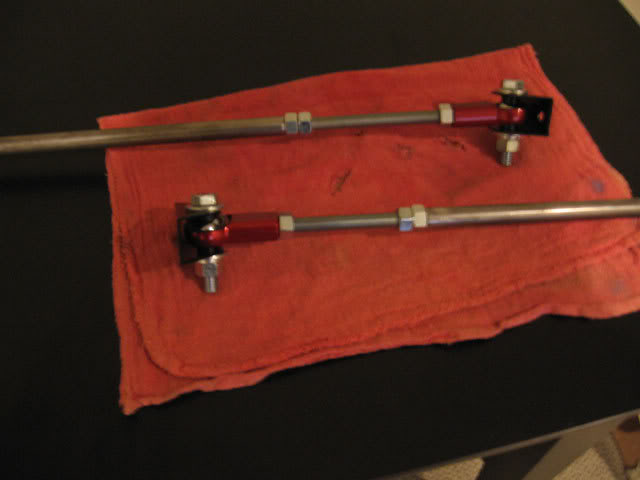
here is the assembled unit, ready to install
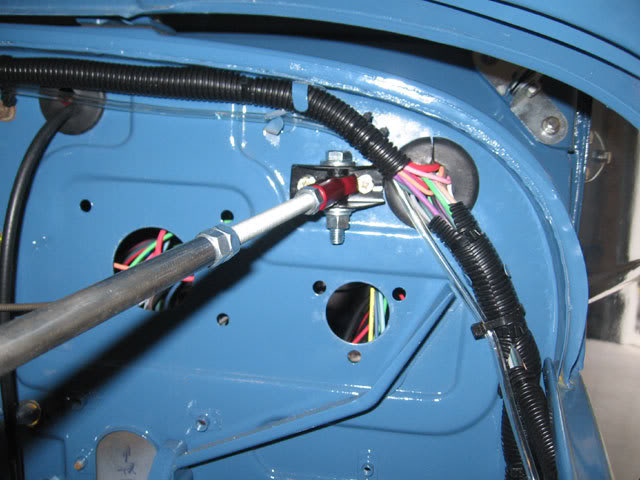
here is the finished product installed. you cant tell from this picture, but the arms angle out enough to clear the master cylinder just perfectly
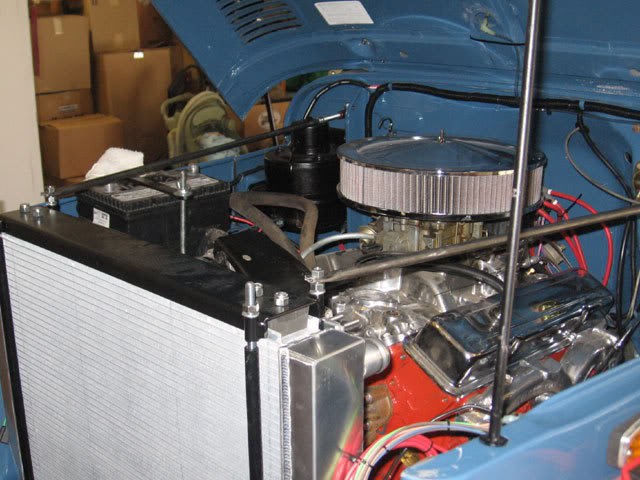
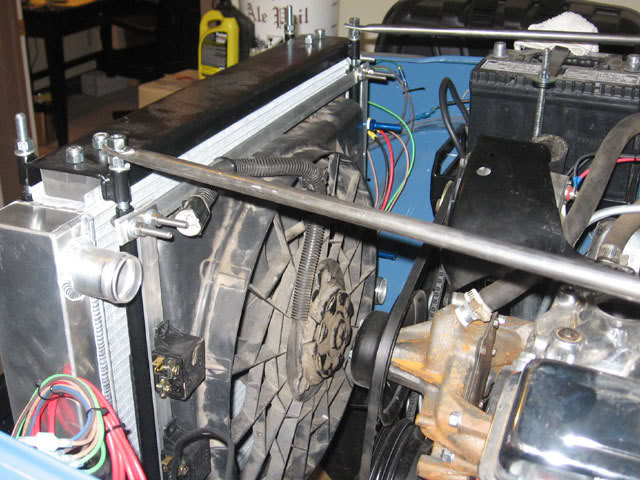
the rest of the finished installation
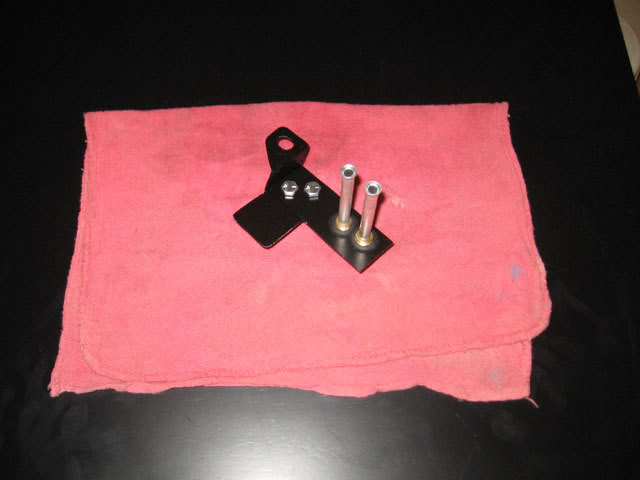
since the new radiator has the transmission cooler built-in, i decided to modify my existing transmission cooler lines for a cleaner install. i re-bent the lines from the transmission up and around the starter. from there, they follow the same upward curves as the oil pan. i made a bracket that bolts near the mechanical fuel pump that the other end of the hard lines connect to. at that point, they terminate into hose barbs, and then i run rubber flexible hoses from there up to the radiator fittings. this set up keeps the hard lines up and out of the way, and allows some flex/movement of the engine, frame, and radiator.
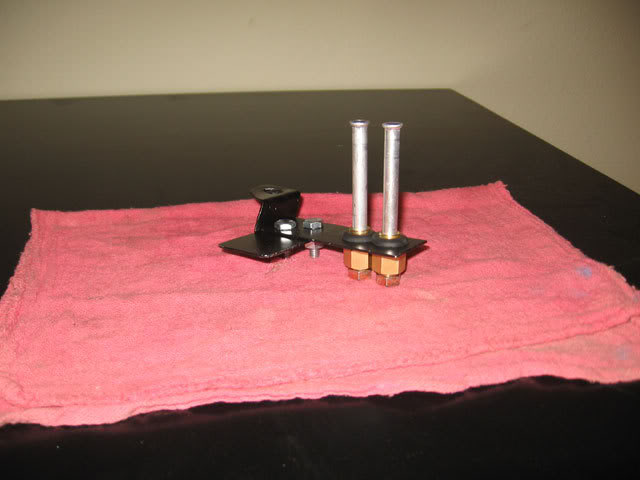
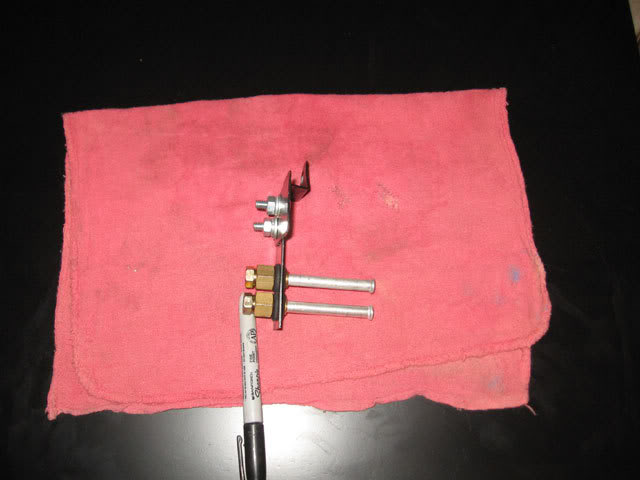
now that the new radiator is in, the next project is the brake lines. after that, just finish up the welding on the steering and it *could* possibly be drivable =)
after tons of research and comparing the pros and cons of various radiator replacements, i decided to go with an oversized aluminum radiator (made by Ron Davis Radiators and sold by Man-a-Fre). i considered a stock replacement copper radiator, but i had heard a lot of people say that they were marginal at best when cooling a V8. i also looked at several other aluminum radiators, including a few drop-in replacements (Man-a-Fre, Be-Cool, and others), but i was looking for something a) a little bigger, b) cross-flow, and c) with a built-in transmission cooler. The Ron Davis/MAF radiator seemed to be just what i was after.

new aluminum radiator with aluminum transmission cooler fittings installed
since i had moved my stock radiator forward a couple of inches, and this new radiator was quite a bit bigger, i was worried about it fitting, but it fit like a glove. i the mounting system that the radiator came with is pretty slick, so installation was really easy. the upper radiator mount also came with some support arms that extend out to the firewall. in order to provide a solid mounting point at the correct angles, i decided to use some heim joints and make some custom brackets.

here are the brackets i cut out of some 1" square tubing and the spacers i used to center the heim joint

here are the heim joints i used. they are 3/8" with 3/8" female threads (from McMaster-Carr)

here are the heim joints attached to some threaded rod and to the radiator support arms. by using the threaded rod, the support arms are adjustable in length

here is a test fitting of the setup. since the heim joint is centered, it is free to move side to side 180° and up and down a total of 24°

here are the brackets after a quick coat of paint

here is the assembled unit, ready to install

here is the finished product installed. you cant tell from this picture, but the arms angle out enough to clear the master cylinder just perfectly


the rest of the finished installation
since the new radiator has the transmission cooler built-in, i decided to modify my existing transmission cooler lines for a cleaner install. i re-bent the lines from the transmission up and around the starter. from there, they follow the same upward curves as the oil pan. i made a bracket that bolts near the mechanical fuel pump that the other end of the hard lines connect to. at that point, they terminate into hose barbs, and then i run rubber flexible hoses from there up to the radiator fittings. this set up keeps the hard lines up and out of the way, and allows some flex/movement of the engine, frame, and radiator.


now that the new radiator is in, the next project is the brake lines. after that, just finish up the welding on the steering and it *could* possibly be drivable =)
Comments:
<< Home
I'm putting a ron davis radiator in my fj and i love your support mounts. i would like more info on them like the rods and the ends and all the other pieces. awsome cruiser! thanks kealay
Post a Comment
<< Home
