Wednesday, July 25, 2007
houston, we have lift off
dateline: July 25th, 2007 - 6:23 PM PST
i turn the key and the engine fires up. i press on the brake pedals and feel the resistance. i pull the shifter lever back until the 'D' indicator glows red and i feel a slight lurch - the first sign that something is different this time. i release the brake and cautiously press the gas pedal and slowly start to creep forward - the beast is moving under its own power. after a maiden voyage of about 20 feet, i press the brakes and come to a stop. the test is complete - the landcruiser is alive.
ok, it wasnt the most amazing sight ever, and there were actually a few hiccups leading up to it, but the landcruiser finally runs and drives and steers and stops all on its own. after we got the rear brakes sorted out, i told ryan we were going to try to drive it. i started it up the first time and put it in gear and...vroom, nothing happened. the engine revved but i didnt move. tried again, going through all of the gears and still nothing. scratched my head a few times and crawled underneath to make sure the transmission lever was working properly. everything checked out fine. for fun, i pulled the transfer case lever down into 4HI and then pushed it back up into 2HI and there was a distinctive engagement feeling. was i in neutral the first time? fired it up again and put it in gear - this time i felt the transmission engage. i shut it off and went inside to gather everyone up. i am sure they were not impressed by the sight of a car driving 1 mph across the carport, but i had been waiting for this day for 3 years, so i wanted them all to see it. eden even rode in the passenger seat for the madien voyage. there are still a few small things to do, and i am sure after a real test drive i will discover a whole new set of issues, but for today, it is official - the landcruiser is alive.
i turn the key and the engine fires up. i press on the brake pedals and feel the resistance. i pull the shifter lever back until the 'D' indicator glows red and i feel a slight lurch - the first sign that something is different this time. i release the brake and cautiously press the gas pedal and slowly start to creep forward - the beast is moving under its own power. after a maiden voyage of about 20 feet, i press the brakes and come to a stop. the test is complete - the landcruiser is alive.
here was the second (and longest to date) trip
ok, it wasnt the most amazing sight ever, and there were actually a few hiccups leading up to it, but the landcruiser finally runs and drives and steers and stops all on its own. after we got the rear brakes sorted out, i told ryan we were going to try to drive it. i started it up the first time and put it in gear and...vroom, nothing happened. the engine revved but i didnt move. tried again, going through all of the gears and still nothing. scratched my head a few times and crawled underneath to make sure the transmission lever was working properly. everything checked out fine. for fun, i pulled the transfer case lever down into 4HI and then pushed it back up into 2HI and there was a distinctive engagement feeling. was i in neutral the first time? fired it up again and put it in gear - this time i felt the transmission engage. i shut it off and went inside to gather everyone up. i am sure they were not impressed by the sight of a car driving 1 mph across the carport, but i had been waiting for this day for 3 years, so i wanted them all to see it. eden even rode in the passenger seat for the madien voyage. there are still a few small things to do, and i am sure after a real test drive i will discover a whole new set of issues, but for today, it is official - the landcruiser is alive.
steering and brakes
my dad showed up monday evening and was ready to get to work on the welding, so we dived in. first thing was to weld the steering column to the firewall dash support.
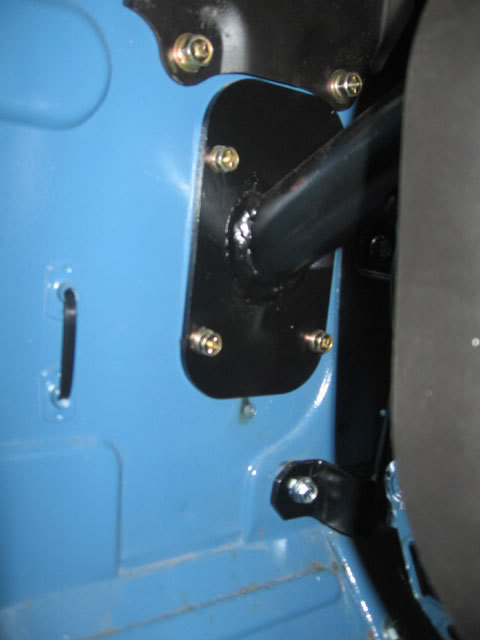
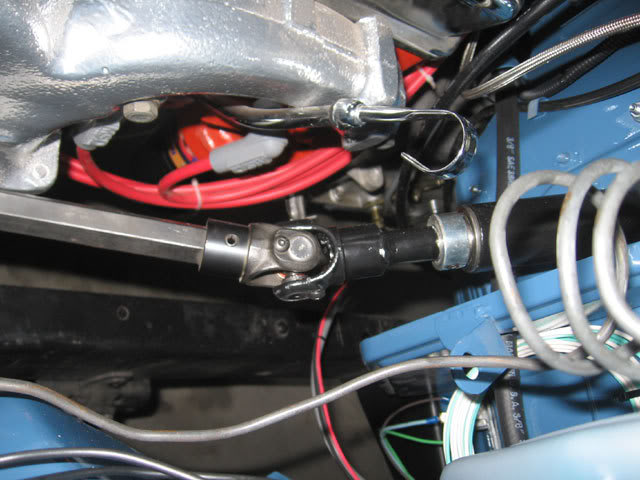
next up was welding the actual steering shaft to the u-joint. this was the critical weld, and i think my dad was impressed with the way it turned out.
we did a few other miscellaneous things, and finally decided to call it a night at midnight. the next morning, i got all of the welded parts primed and painted while my dad started welding the steering box plates to the frame. there was quite a bit to weld, and some upside-down crazy angles, but in the end, it turned out good and most importantly, strong.
once everything was welded up and painted, we installed the brake pedal and then slid the steering column into place. we had to spend a little time getting the steering wheel adjusted just right so that it was not too compressed against the column, but we finally got it perfect.

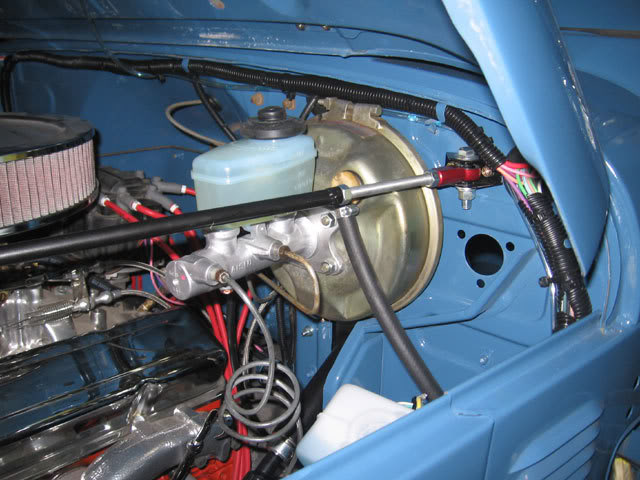
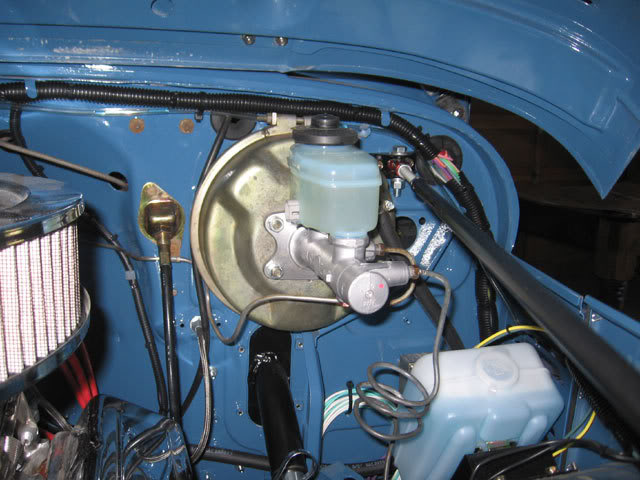
with the steering finished, next up was the brakes. my dad donated his original brake booster that was in much better shape than mine. after some scrubbing with the brillo pad, it looked just like new. we bolted up the new master cylinder (from an fj80 with no ABS) and installed the whole unit. a few days before, i had run the remaining brake lines, so finishing the brakes was as easy as screwing in the two hard lines.
the next thing to complete was the transmission cooler lines. after a quick trip to the parts store for some vacuum hose and transmission cooler hose, we were back at it. the lower bracket that i had made where the hard lines connected to the rubber lines bolted on in a hard-to-get-to spot that took some time to work out, but we finally got it. we put the radiator back in, hooked up the transmission cooler lines and the radiator hoses and crossed that off the list.
the only thing left to do before we could test drive it was to bleed the brakes. with my dad and ryan doing most of the dirty work, we did the front two in a matter of minutes and it was on to the back. try after try, no fluid was making it to the calipers. i suspected that maybe something was clogging the lines, but we finally figured out that no fluid was even coming out of the master cylinder for the back brake circuit. we tried everything, but we couldnt get fluid out of it. we finally took a break to come in and eat some pizza and think things over. after dinner, i did some research on the internet and based on that, decided that we needed to 'bench bleed' the master cylinder. so we drained it, took it off, and used some old brake lines and some windshield washer tubing to make a make-shift bleeder kit. with the first long push of the rod, lots of air and then fluid finally came out of the back brake circuit. we finished bench bleeding the master cylinder and then installed it back into the landcruiser. we re-bled the front brakes just in case, and then did the back. they bled fine this time, but now there was a new problem - the lines were leaking at almost every connection. oops - i had installed those almost two years ago and never did tighten them. we tightened them up, but two connections were still leaking. my dad was headed out early the next morning, but i finally decided that we just needed to call it a night.
the next morning i spent some time thinking abou the issues and how to solve them. that afternoon when i finally had the chance to spend some time working on it again, i decided to take the whole back portion of the brake lines off and re-assess everything. ryan helped me by cleaning up the tee fitting and the hose ends, while i made a new bracket to position the tee in a better spot. we re-connected all of the lines to the tee and double checked that everything looked good before installing the whole unit back under the landcruiser. i pumped up the brakes and there were no leaks. we went ahead and re-bled the front brakes and then did the rear. the finally bled properly and with no leaks. at that point, i had power, steering, and brakes - all of the ingredients required to actually drive the thing for the first time.
next up was welding the actual steering shaft to the u-joint. this was the critical weld, and i think my dad was impressed with the way it turned out.
we did a few other miscellaneous things, and finally decided to call it a night at midnight. the next morning, i got all of the welded parts primed and painted while my dad started welding the steering box plates to the frame. there was quite a bit to weld, and some upside-down crazy angles, but in the end, it turned out good and most importantly, strong.
once everything was welded up and painted, we installed the brake pedal and then slid the steering column into place. we had to spend a little time getting the steering wheel adjusted just right so that it was not too compressed against the column, but we finally got it perfect.
with the steering finished, next up was the brakes. my dad donated his original brake booster that was in much better shape than mine. after some scrubbing with the brillo pad, it looked just like new. we bolted up the new master cylinder (from an fj80 with no ABS) and installed the whole unit. a few days before, i had run the remaining brake lines, so finishing the brakes was as easy as screwing in the two hard lines.
the next thing to complete was the transmission cooler lines. after a quick trip to the parts store for some vacuum hose and transmission cooler hose, we were back at it. the lower bracket that i had made where the hard lines connected to the rubber lines bolted on in a hard-to-get-to spot that took some time to work out, but we finally got it. we put the radiator back in, hooked up the transmission cooler lines and the radiator hoses and crossed that off the list.
the only thing left to do before we could test drive it was to bleed the brakes. with my dad and ryan doing most of the dirty work, we did the front two in a matter of minutes and it was on to the back. try after try, no fluid was making it to the calipers. i suspected that maybe something was clogging the lines, but we finally figured out that no fluid was even coming out of the master cylinder for the back brake circuit. we tried everything, but we couldnt get fluid out of it. we finally took a break to come in and eat some pizza and think things over. after dinner, i did some research on the internet and based on that, decided that we needed to 'bench bleed' the master cylinder. so we drained it, took it off, and used some old brake lines and some windshield washer tubing to make a make-shift bleeder kit. with the first long push of the rod, lots of air and then fluid finally came out of the back brake circuit. we finished bench bleeding the master cylinder and then installed it back into the landcruiser. we re-bled the front brakes just in case, and then did the back. they bled fine this time, but now there was a new problem - the lines were leaking at almost every connection. oops - i had installed those almost two years ago and never did tighten them. we tightened them up, but two connections were still leaking. my dad was headed out early the next morning, but i finally decided that we just needed to call it a night.
the next morning i spent some time thinking abou the issues and how to solve them. that afternoon when i finally had the chance to spend some time working on it again, i decided to take the whole back portion of the brake lines off and re-assess everything. ryan helped me by cleaning up the tee fitting and the hose ends, while i made a new bracket to position the tee in a better spot. we re-connected all of the lines to the tee and double checked that everything looked good before installing the whole unit back under the landcruiser. i pumped up the brakes and there were no leaks. we went ahead and re-bled the front brakes and then did the rear. the finally bled properly and with no leaks. at that point, i had power, steering, and brakes - all of the ingredients required to actually drive the thing for the first time.
Tuesday, July 24, 2007
once you start, you cant stop
my dad was coming up the next day to weld the steering components and help finish up a few other things, so i was trying to wrap up everything else. the last thing i wanted to get done was to finish flushing the cooling system. i had flushed it a few times already and this was going to be the final time. i started up the engine and let it run for about 10 minutes. then i turned the key off to shut off the engine and...nothing happened. the motor just kept running as usual. i turned the key back to ON and then OFF again - nothing. i turned it over to the accessory position - nothing. i finally grabbed the coil wire and pulled it off the distributor and the motor died.
after doing quite a bit of research, i discovered that an internally-regulated distributor will actually feed power back up the exciter wire and keep the coil powered, even when the ignition is off. the fix is to either wire the exciter wire through a dashboard light, or install a diode in the wire - in either case, it only allows the power to flow one-way and solves the problem. so, i made a quick trip to radio shack and picked up a diode and a fuse holder. as i was checking out, the radio shack clerk said 'lemme guess, motor starts but wont turn off when you turn off the key?'. guess i was not the first person to run into this issue =)
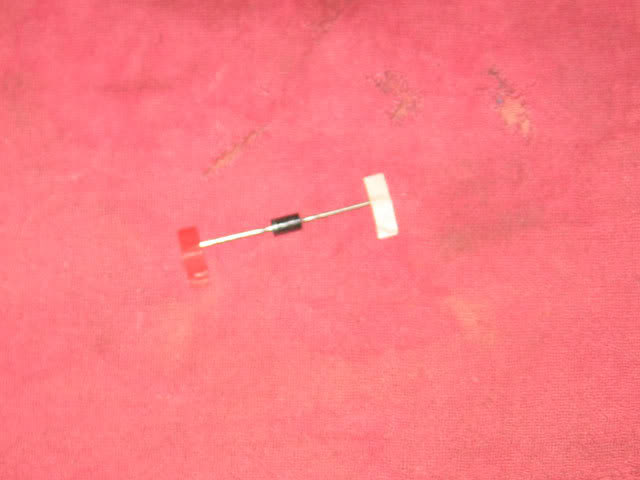
here is the diode i used
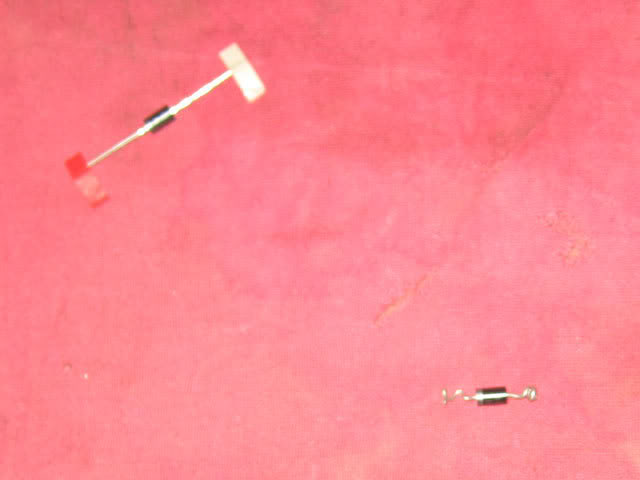
i bent the diode wires into a spiral to form the rough shape of a fuse
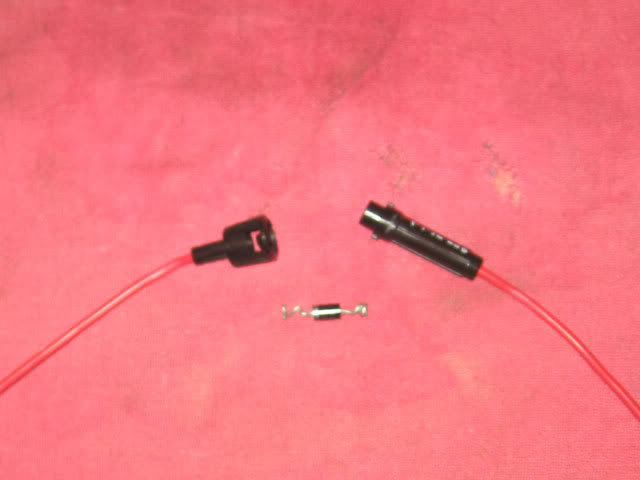
once bent up, the diode fit in the fuse holder perfectly
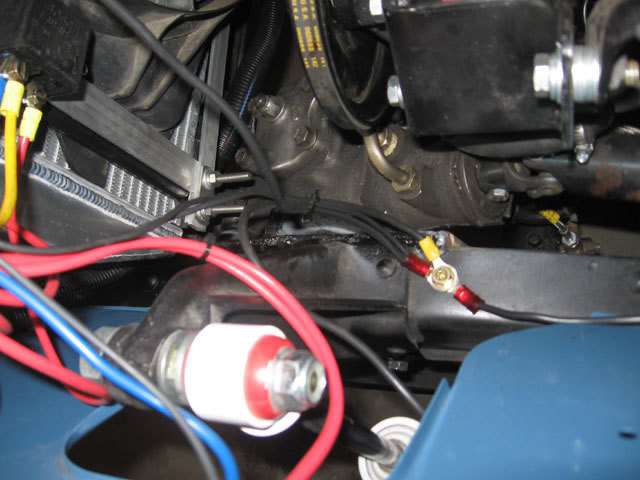
i plugged the fuse holder/diode into the exciter wire, started the engine, switched the key back to OFF, and the motor died - problem solved.
after doing quite a bit of research, i discovered that an internally-regulated distributor will actually feed power back up the exciter wire and keep the coil powered, even when the ignition is off. the fix is to either wire the exciter wire through a dashboard light, or install a diode in the wire - in either case, it only allows the power to flow one-way and solves the problem. so, i made a quick trip to radio shack and picked up a diode and a fuse holder. as i was checking out, the radio shack clerk said 'lemme guess, motor starts but wont turn off when you turn off the key?'. guess i was not the first person to run into this issue =)
here is the diode i used
i bent the diode wires into a spiral to form the rough shape of a fuse
once bent up, the diode fit in the fuse holder perfectly
i plugged the fuse holder/diode into the exciter wire, started the engine, switched the key back to OFF, and the motor died - problem solved.
Monday, July 23, 2007
radiator redux
after seeing all of the rust and gunk that was in my radiator and heater hoses, i finally decided to do what i had known i was going to have to do all along: get a whole new radiator. i had already spent time adapting the taurus fan to work with the stock radiator and moving the radiator mounts to clear the water pump, but the old stock radiator was just too crusty to try to make work. i just spent a lot of money on rebuilding the landcruiser, and i didnt want to ruin the engine with inadequate cooling. although a new radiator was going to be more money and more work, when i finally removed the old radiator, i could heard the chunks of rust sloshing around inside, and i knew i had made the right decision.
after tons of research and comparing the pros and cons of various radiator replacements, i decided to go with an oversized aluminum radiator (made by Ron Davis Radiators and sold by Man-a-Fre). i considered a stock replacement copper radiator, but i had heard a lot of people say that they were marginal at best when cooling a V8. i also looked at several other aluminum radiators, including a few drop-in replacements (Man-a-Fre, Be-Cool, and others), but i was looking for something a) a little bigger, b) cross-flow, and c) with a built-in transmission cooler. The Ron Davis/MAF radiator seemed to be just what i was after.
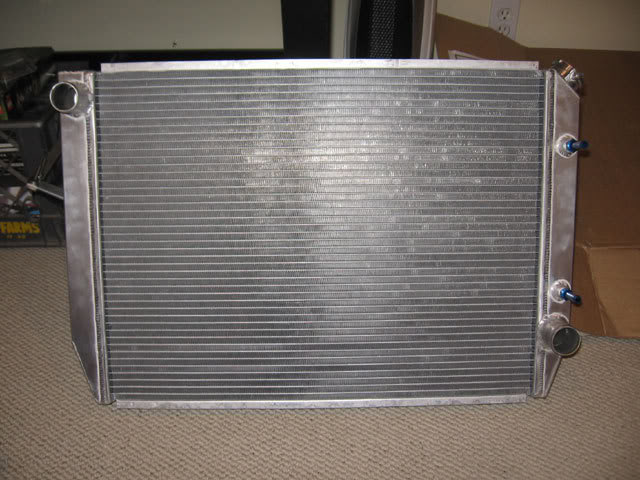
new aluminum radiator with aluminum transmission cooler fittings installed
since i had moved my stock radiator forward a couple of inches, and this new radiator was quite a bit bigger, i was worried about it fitting, but it fit like a glove. i the mounting system that the radiator came with is pretty slick, so installation was really easy. the upper radiator mount also came with some support arms that extend out to the firewall. in order to provide a solid mounting point at the correct angles, i decided to use some heim joints and make some custom brackets.
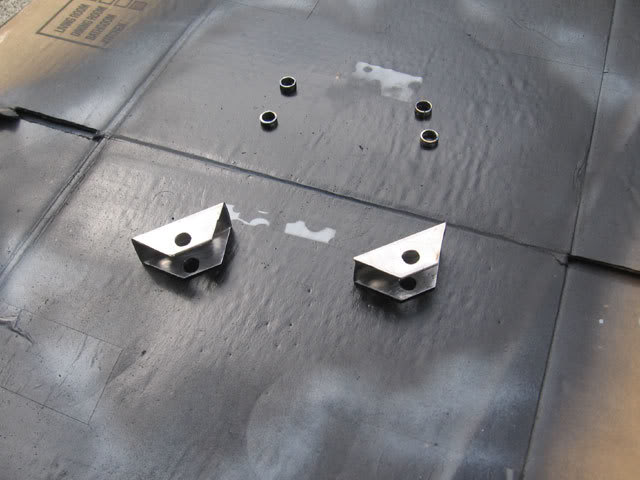
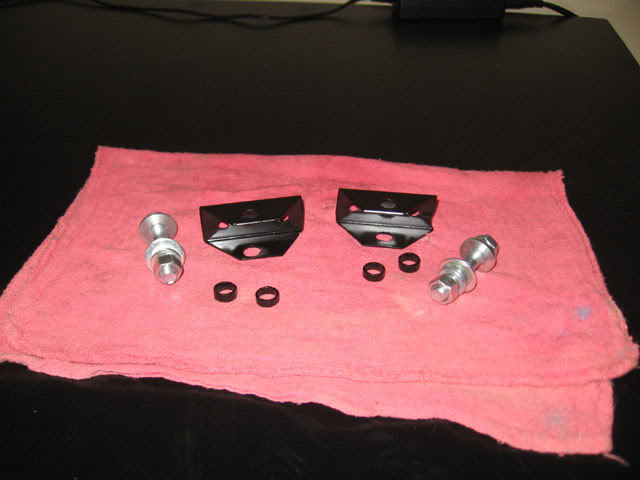
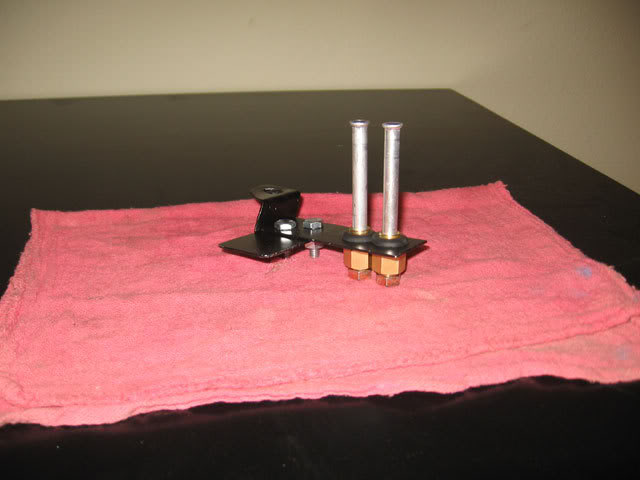
here are the brackets i cut out of some 1" square tubing and the spacers i used to center the heim joint
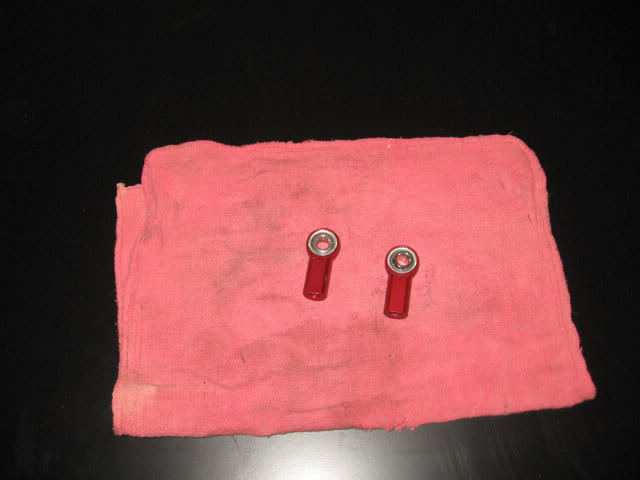
here are the heim joints i used. they are 3/8" with 3/8" female threads (from McMaster-Carr)
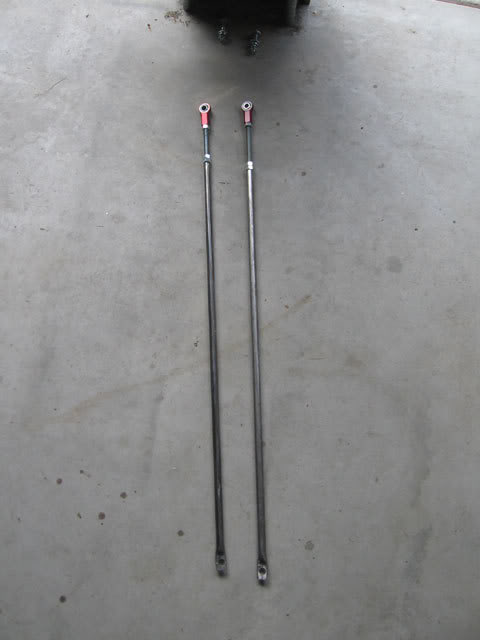
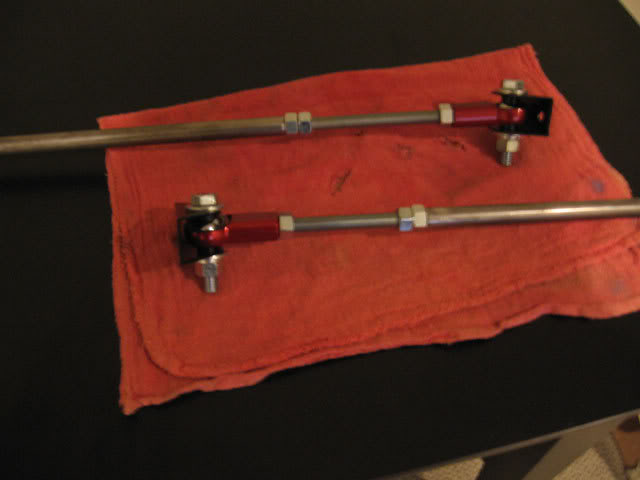
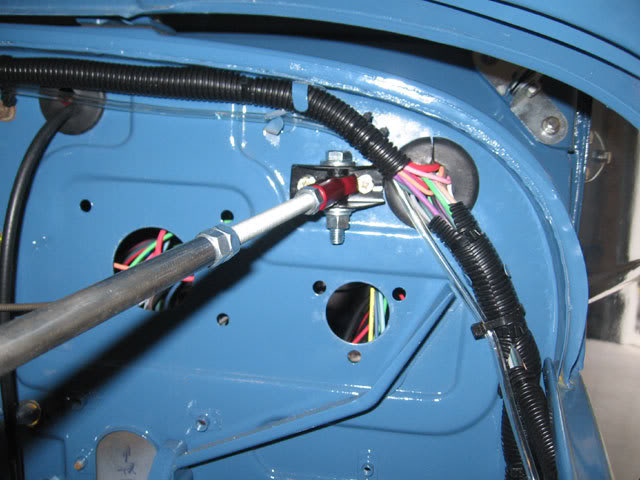
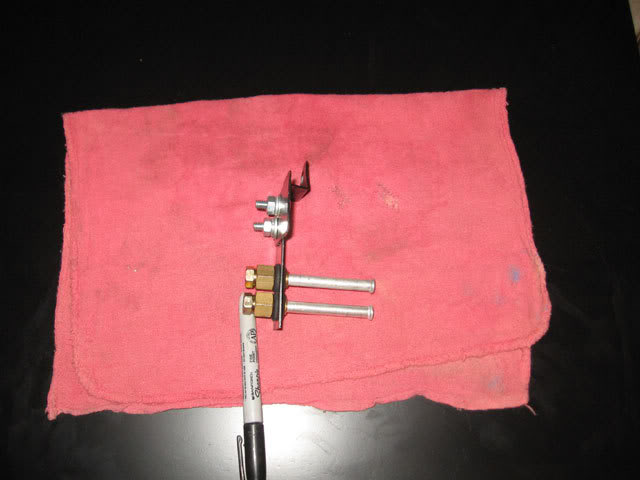
here are the heim joints attached to some threaded rod and to the radiator support arms. by using the threaded rod, the support arms are adjustable in length
here is a test fitting of the setup. since the heim joint is centered, it is free to move side to side 180° and up and down a total of 24°
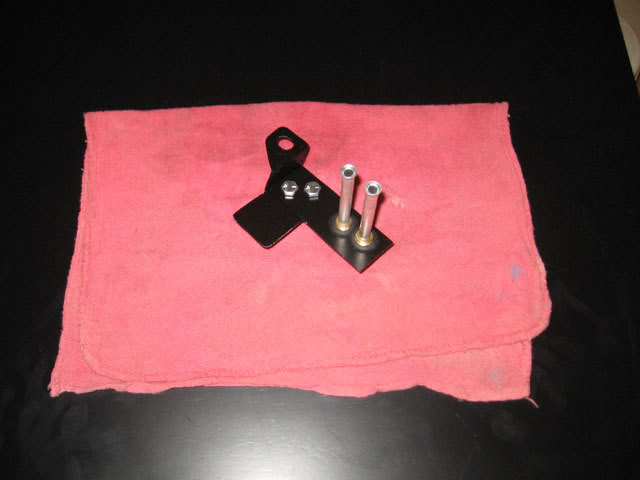
here are the brackets after a quick coat of paint
here is the assembled unit, ready to install
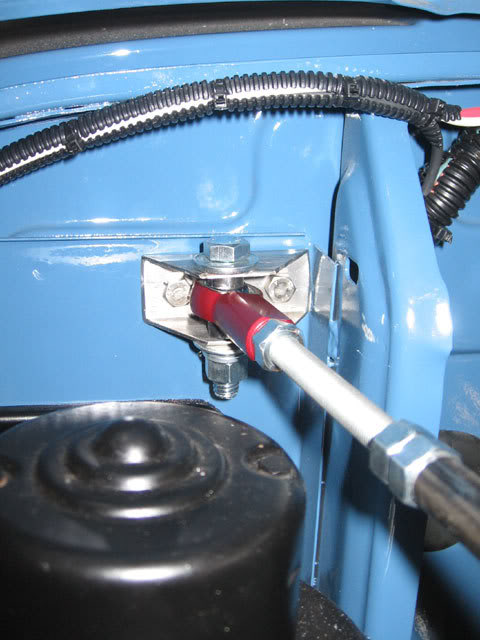
here is the finished product installed. you cant tell from this picture, but the arms angle out enough to clear the master cylinder just perfectly
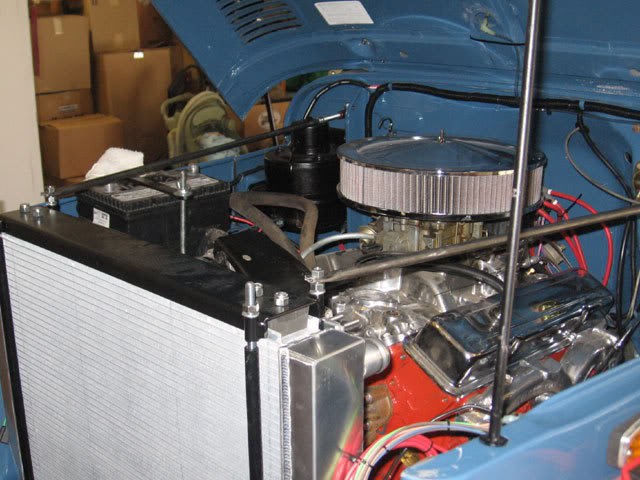
the rest of the finished installation
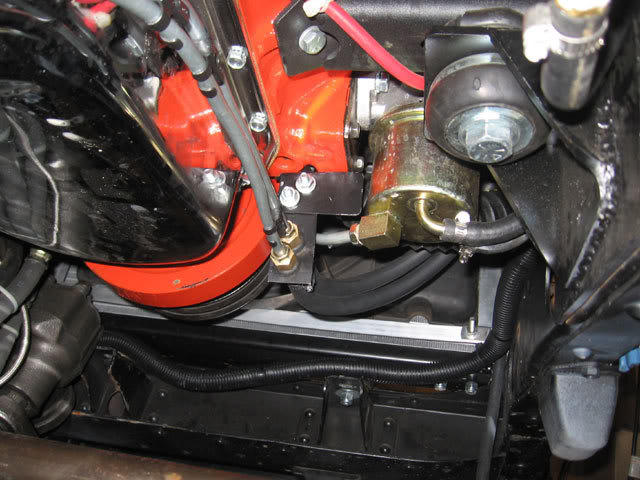
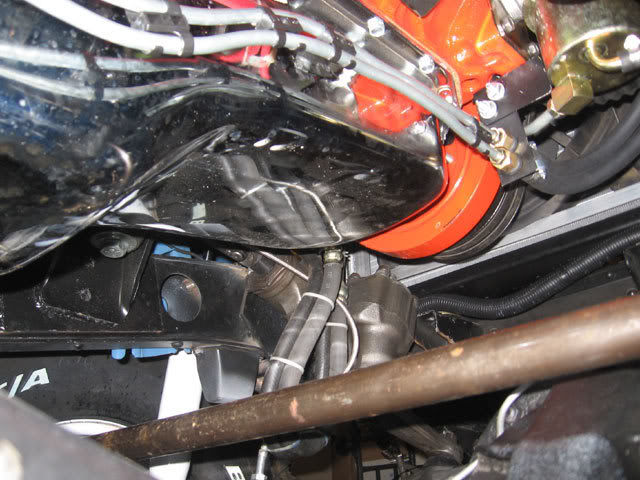
since the new radiator has the transmission cooler built-in, i decided to modify my existing transmission cooler lines for a cleaner install. i re-bent the lines from the transmission up and around the starter. from there, they follow the same upward curves as the oil pan. i made a bracket that bolts near the mechanical fuel pump that the other end of the hard lines connect to. at that point, they terminate into hose barbs, and then i run rubber flexible hoses from there up to the radiator fittings. this set up keeps the hard lines up and out of the way, and allows some flex/movement of the engine, frame, and radiator.
now that the new radiator is in, the next project is the brake lines. after that, just finish up the welding on the steering and it *could* possibly be drivable =)
after tons of research and comparing the pros and cons of various radiator replacements, i decided to go with an oversized aluminum radiator (made by Ron Davis Radiators and sold by Man-a-Fre). i considered a stock replacement copper radiator, but i had heard a lot of people say that they were marginal at best when cooling a V8. i also looked at several other aluminum radiators, including a few drop-in replacements (Man-a-Fre, Be-Cool, and others), but i was looking for something a) a little bigger, b) cross-flow, and c) with a built-in transmission cooler. The Ron Davis/MAF radiator seemed to be just what i was after.
new aluminum radiator with aluminum transmission cooler fittings installed
since i had moved my stock radiator forward a couple of inches, and this new radiator was quite a bit bigger, i was worried about it fitting, but it fit like a glove. i the mounting system that the radiator came with is pretty slick, so installation was really easy. the upper radiator mount also came with some support arms that extend out to the firewall. in order to provide a solid mounting point at the correct angles, i decided to use some heim joints and make some custom brackets.
here are the brackets i cut out of some 1" square tubing and the spacers i used to center the heim joint
here are the heim joints i used. they are 3/8" with 3/8" female threads (from McMaster-Carr)
here are the heim joints attached to some threaded rod and to the radiator support arms. by using the threaded rod, the support arms are adjustable in length
here is a test fitting of the setup. since the heim joint is centered, it is free to move side to side 180° and up and down a total of 24°
here are the brackets after a quick coat of paint
here is the assembled unit, ready to install
here is the finished product installed. you cant tell from this picture, but the arms angle out enough to clear the master cylinder just perfectly
the rest of the finished installation
since the new radiator has the transmission cooler built-in, i decided to modify my existing transmission cooler lines for a cleaner install. i re-bent the lines from the transmission up and around the starter. from there, they follow the same upward curves as the oil pan. i made a bracket that bolts near the mechanical fuel pump that the other end of the hard lines connect to. at that point, they terminate into hose barbs, and then i run rubber flexible hoses from there up to the radiator fittings. this set up keeps the hard lines up and out of the way, and allows some flex/movement of the engine, frame, and radiator.
now that the new radiator is in, the next project is the brake lines. after that, just finish up the welding on the steering and it *could* possibly be drivable =)
Wednesday, July 18, 2007
not quite done yet, but...
got a few more little things wrapped up, including the accelerator pedal, gas tank, and new electric fan mount.
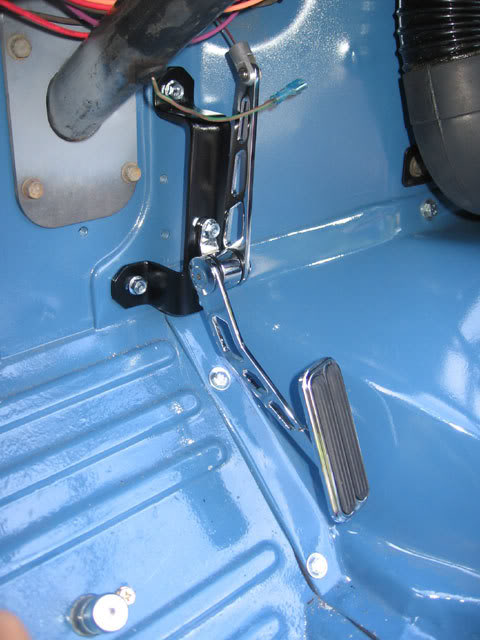
here is the gas pedal installed. after this picture was taken i also put a little rubber bumper between the mount and the pedal arm so there wont be any metal-to-metal contact
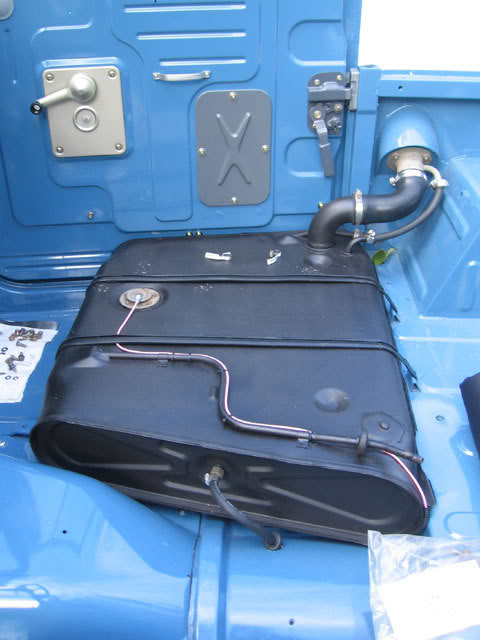
to clean out the gas tank, i put some gravel pieces in it with a small amount of gas and shook it around until my arms were tired. a trick i learned was to count out the number of pieces of gravel you put in so that you know how many you have to fish back out. once the inside was cleaned out, i cleaned up the outside and gave it a new coat of black spray paint.
after seeing all of the crud that was in my heater core and hoses, i knew my cooling system was really rusty inside. each time i have ran the engine, it has gotten pretty hot and started spewing out antifreeze, so i finally decided to break down and just get a new radiator. i got an oversized aluminum model (pictures of that to come) that came with a pretty slick mounting system. however, i had to figure out how to mount the taurus electric fan to the new system.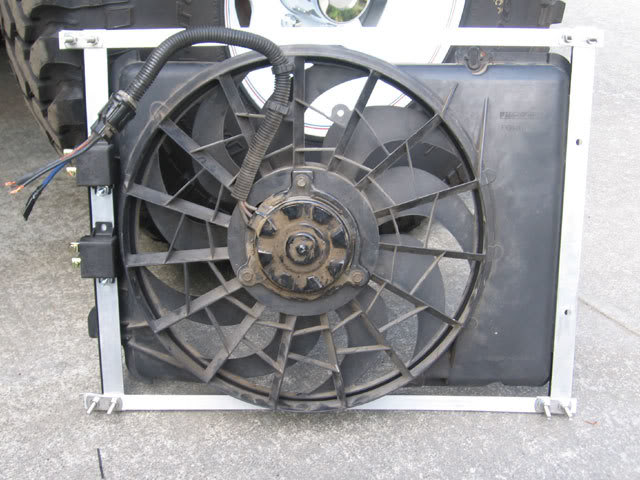
i created an aluminum frame out of some aluminum flat stock and angle stock. since the fan is actually molded at a bit of an angle, i was able to offset one side enough so that the whole fan fit flush next to the radiator.
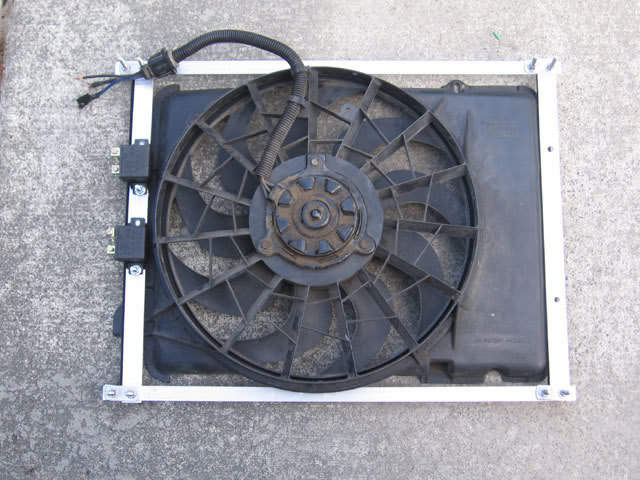
i was also able to mount my high and low speed fan relays to the frame
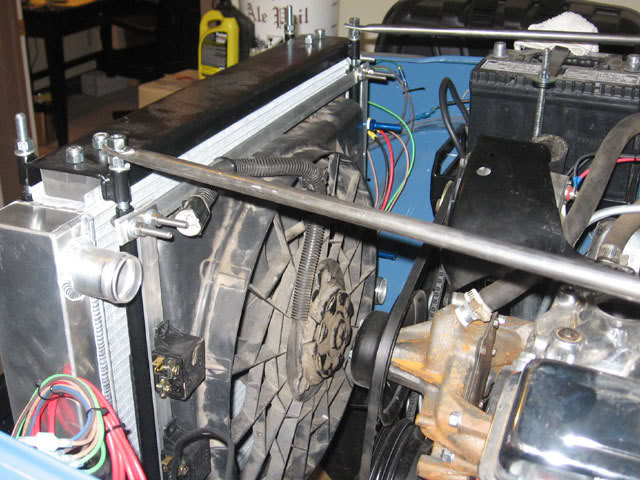
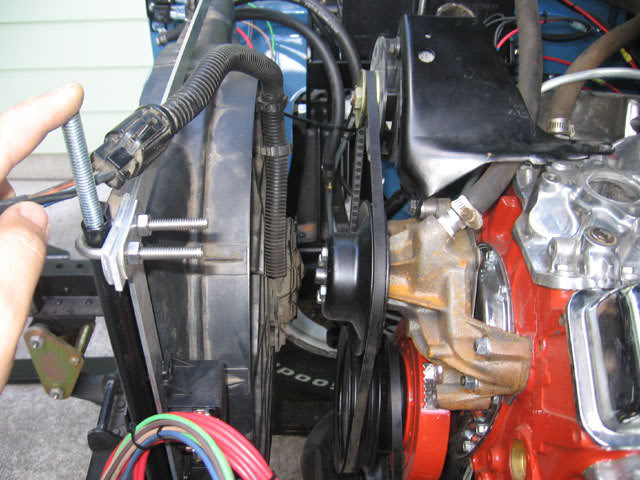
when the aluminum frame was complete and the fan was mounted to it, i used some small u-bolts to mount the frame to the round bar used in the radiator support. since the round bar slides over the threaded rods that are the actual support arms, i can easily slide the whole fan/mount system on and off without removing the radiator (and i can also remove the radiator without removing the fan).
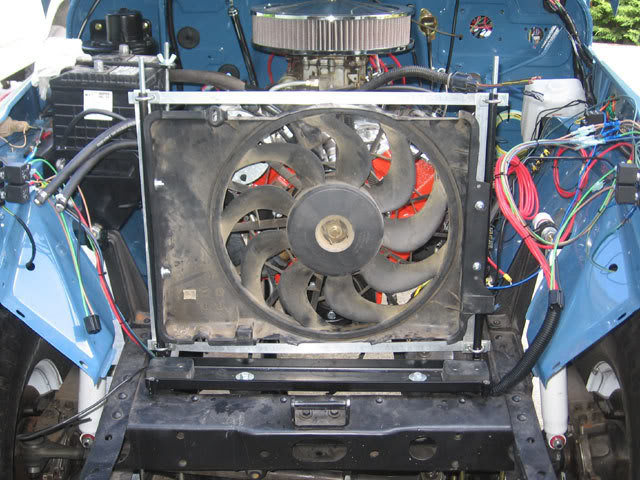
since i had originally moved my old radiator forward about two inches for clearance, i mounted the new radiator in the same modified position. in position, with the new fan mount, i actually ended up with a tiny bit more clearance between the fan and the water pump as well.
next up will be installing the radiator (including upper support arms, new hoses, and the transmission cooler lines).
here is the gas pedal installed. after this picture was taken i also put a little rubber bumper between the mount and the pedal arm so there wont be any metal-to-metal contact
to clean out the gas tank, i put some gravel pieces in it with a small amount of gas and shook it around until my arms were tired. a trick i learned was to count out the number of pieces of gravel you put in so that you know how many you have to fish back out. once the inside was cleaned out, i cleaned up the outside and gave it a new coat of black spray paint.
after seeing all of the crud that was in my heater core and hoses, i knew my cooling system was really rusty inside. each time i have ran the engine, it has gotten pretty hot and started spewing out antifreeze, so i finally decided to break down and just get a new radiator. i got an oversized aluminum model (pictures of that to come) that came with a pretty slick mounting system. however, i had to figure out how to mount the taurus electric fan to the new system.
i created an aluminum frame out of some aluminum flat stock and angle stock. since the fan is actually molded at a bit of an angle, i was able to offset one side enough so that the whole fan fit flush next to the radiator.
i was also able to mount my high and low speed fan relays to the frame
when the aluminum frame was complete and the fan was mounted to it, i used some small u-bolts to mount the frame to the round bar used in the radiator support. since the round bar slides over the threaded rods that are the actual support arms, i can easily slide the whole fan/mount system on and off without removing the radiator (and i can also remove the radiator without removing the fan).
since i had originally moved my old radiator forward about two inches for clearance, i mounted the new radiator in the same modified position. in position, with the new fan mount, i actually ended up with a tiny bit more clearance between the fan and the water pump as well.
next up will be installing the radiator (including upper support arms, new hoses, and the transmission cooler lines).