Friday, June 29, 2007
a little more progress...
havent gotten quite as much done lately, but did get a few little things done, including the transmission hump, heater, mirrors, and cleaning up some of the wiring
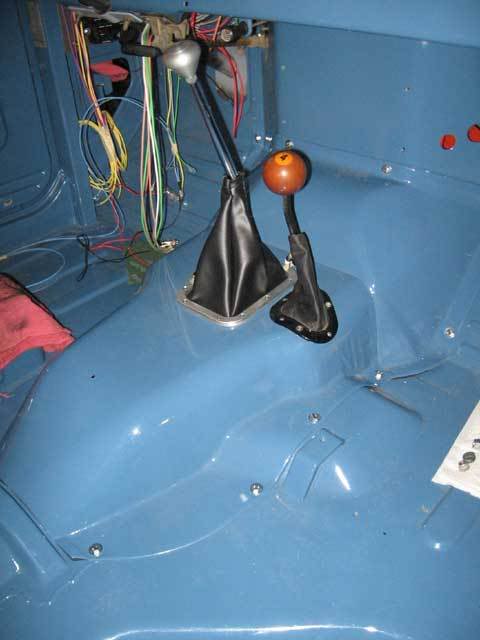
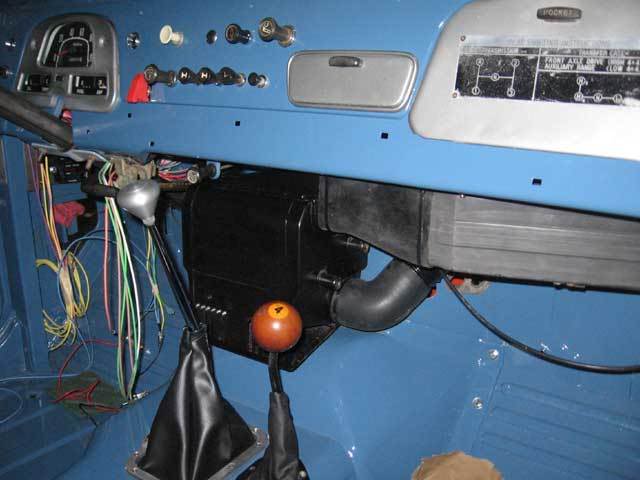
transmission hump
heater, including defrost ducts
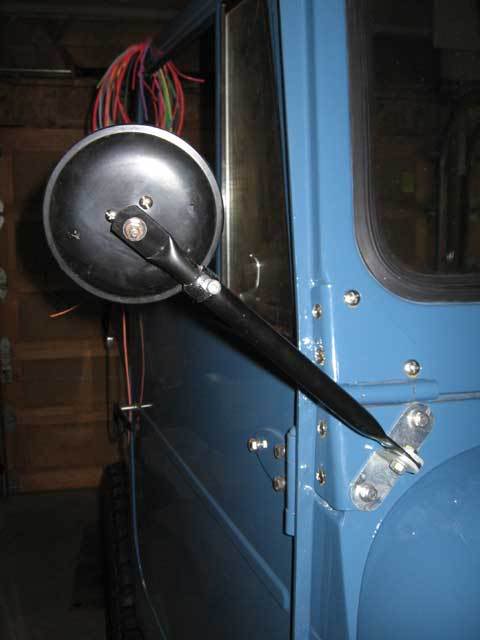
mirrors
loomed all of the wiring to clean it up a bit
transmission hump
heater, including defrost ducts
mirrors
loomed all of the wiring to clean it up a bit
Friday, June 15, 2007
more progress
spent some more time wiring last weekend and have everything just about done now. every knob and control on the dash is in and working (minus the windshield washer, but only because i dont have a washer to hook up). the hardest part was definitely the hazard switch/turn signal switch/brake switch. i tried to wire it up according to the service manual, but it didnt work. i searched on the internet and found only one other suggested way of wiring it, which got me closer, but still didnt work right. i tried all kinds of combinations of wires - some didnt work at all, some gave me dim or intermittent blinkers, some gave me blinkers but only when the brakes were off, brakes lights that were on constantly, or setups that only worked when the key was off. i finally started from scratch, bypassed the harness, and took one wire at a time. i even got michaleen out there to help test wires with the multimeter. we worked through it until we had a set up that worked, then i started integrating the harness back in. when i was done, i had it set up to use the provided harness wires, the stock hazard switch, turn signal switch, and brake switch, and no additional parts (such as extra relays).
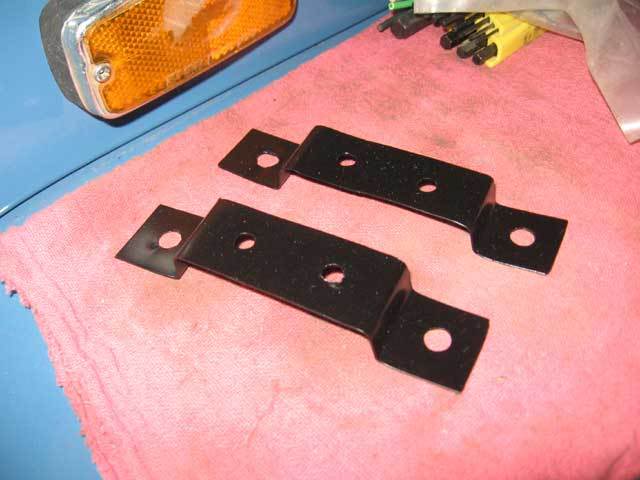
in the meantime, i needed to finish up wiring the headlights. i decided to put each light and each high/low beam on a seperate relay. all i needed to do was find a good place to mount the relays. after being inspired by my dad's slick overflow tank bracket, i made up some brackets out of sheet metal that i could mount using the bolts that hold the front bib in place.
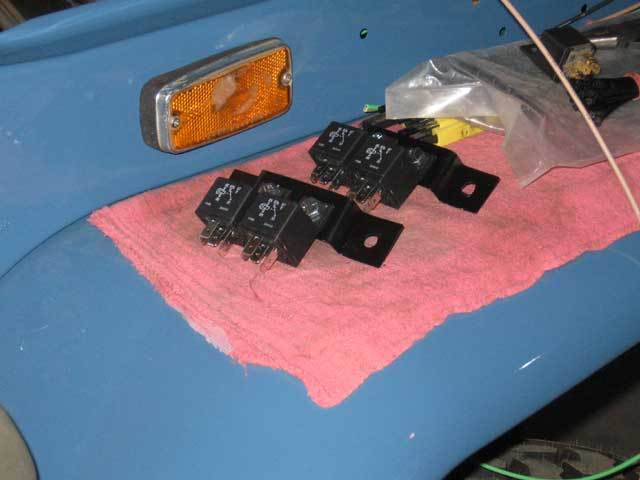
with the relays mounted on the brackets
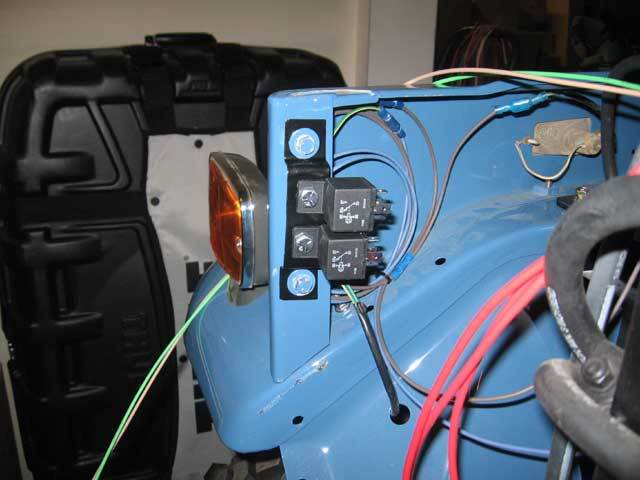
whole thing mounted to the cruiser. i think they turned out pretty nice.
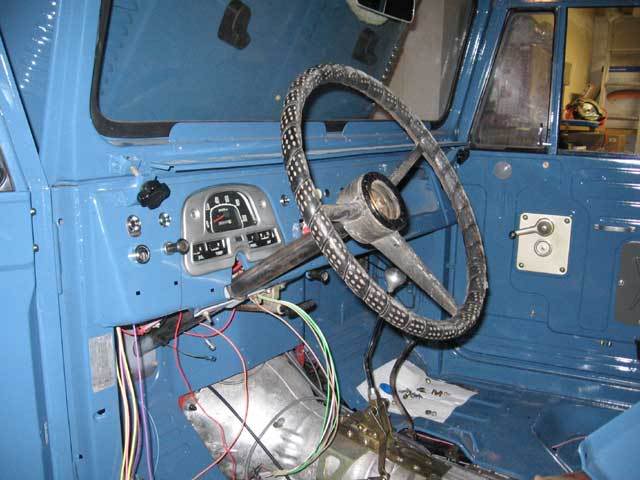
now that all of the under dash wiring was complete, the next thing to do was to turn to the steering. i need to weld the steering column to the lower firewall support, so i needed to mock it all up to get the right position for the steering wheel. here is the steering wheel in place, ready to measure. i am going hiking this weekend, but hopefully i can get the steering wrapped up next week. after that, i just need to run the brake lines and bolt a bunch of stuff back on and she will be ready to go (well, at least ready to gingerly back out of the garage under her own power).
in the meantime, i needed to finish up wiring the headlights. i decided to put each light and each high/low beam on a seperate relay. all i needed to do was find a good place to mount the relays. after being inspired by my dad's slick overflow tank bracket, i made up some brackets out of sheet metal that i could mount using the bolts that hold the front bib in place.
with the relays mounted on the brackets
whole thing mounted to the cruiser. i think they turned out pretty nice.
now that all of the under dash wiring was complete, the next thing to do was to turn to the steering. i need to weld the steering column to the lower firewall support, so i needed to mock it all up to get the right position for the steering wheel. here is the steering wheel in place, ready to measure. i am going hiking this weekend, but hopefully i can get the steering wrapped up next week. after that, i just need to run the brake lines and bolt a bunch of stuff back on and she will be ready to go (well, at least ready to gingerly back out of the garage under her own power).
Thursday, June 07, 2007
progress update
| no posts for a long time here since progress has been slow since we moved. but this past weekend i spent quite a bit of time working on the landcruiser and actually got quite a lot of stuff done. i had started working on the doors awhile back, but never finished because i didnt have the weatherstripping for the vent windows. i finally got it, so i decided to finish up the doors. between the new regulators, weatherstipping, and some fresh spray paint, i think they turned out really nice. |  | |
| i have been ready to dive into the wiring, so the first thing i did was to get the battery mounted. i ended up using a mount from man-a-fre that mounts to the shock tower. it was pretty painless to install after making a few modifications, and it seems rock solid. you cant see it here, but i also got the positive and negative cables all wired up. | 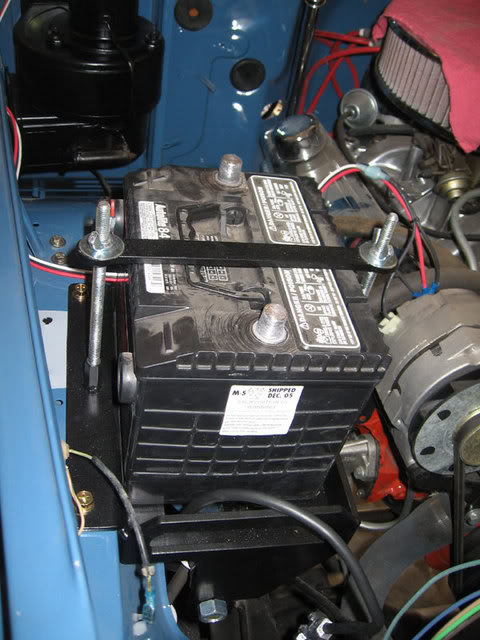 | |
| next up was the front driveline. i had been fighting with this issue for a long time. using the stock transfer case with the th350 caused the front output of the transfer case to be very close to the transmission pan. i finally got a custom driveshaft made by Tom Wood and, although it had been laying on my garage floor for a couple of months, i just gotten around to putting it in. i 'modified' my tranmission pan (in other words, beat on it with a big hammer to dent it in on one side) and used the grinder to take some of the lip off. i also had to make a special low-profile bolt to use for one of the transmission pan bolts. in the end, it was a very very tight fit, but the driveshaft just clears the transmission and seems like it will work. no pictures, but you can be sure that i am glad that is done. | | |
| i also installed the rear bumper, complete with spare tire mount and cooler carrier. it was a very straight-forward install, except that i broke three 1/2" drill bits drilling the holes in the frame. overall though, it turned out great and i think it looks really good. all i have to do is throw a cooler in and be ready for a nice long excursion (oh, and get the vehicle running, steering, stopping, and all that stuff too). | | |
| finally, it was time to dive into the wiring. i had actually been looking forward to doing the wiring the most on this project. my old harness was pretty ragged and crusty, so i was replacing all of the wiring in the vehicle with a wiring harness i got from EZ Wiring. the first order of business was to mount the fuse panel. i made up a bracket out of some sheet metal and mounted it to the original fuse block location. i ran the wires for the rear of the vehicle first and got everything back there wired up. | | |
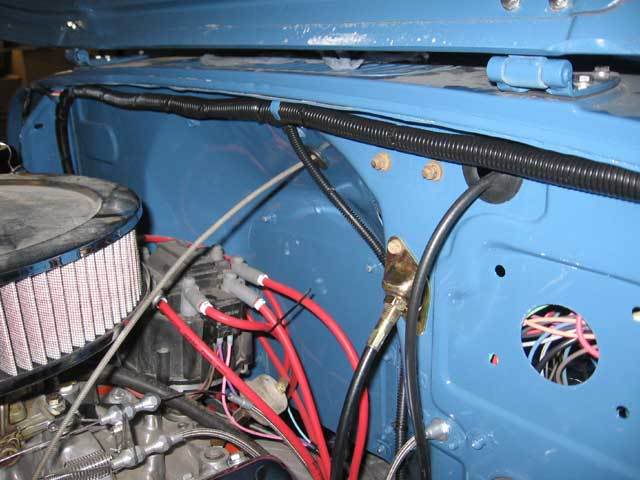
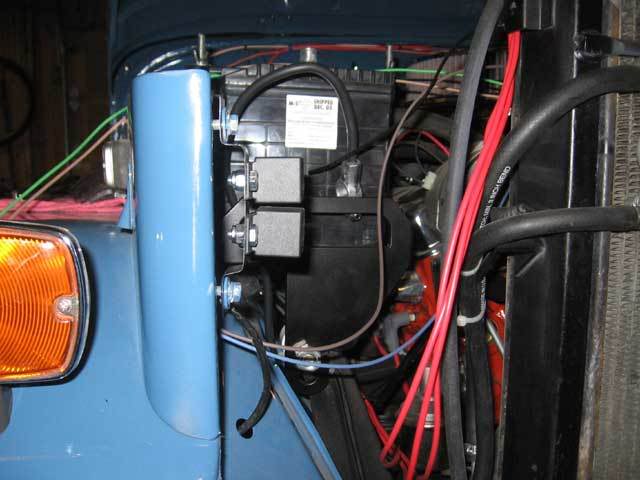
| next up was wiring the engine compartment. i already had the battery mounted and the battery cables in place, so i wired in the starter, alternator, and distributor, as well as the temperature and oil sending units. i ran 12volts to a distribution block and ran power leads to my two fan relays as well as the thermostat module. i wired up the taurus fan so that the low speed is controlled by the thermostat a nd the high speed is controlled by a manual override. all of it is wired to a three-way switch on the dash that lets me toggle between the modes. i also wired up the front turn signals and parking lights, but didnt wire in the headlights or horn yet until i get a few more relays. |  | |
| while i was running wires in the engine compartment, i also installed the heater blower. i cleaned it up and painted it black and got the vent pull all re-installed. i cleaned up and painted the actual heater core as well, but didnt not install it yet until i finish the rest of the dash wiring. | 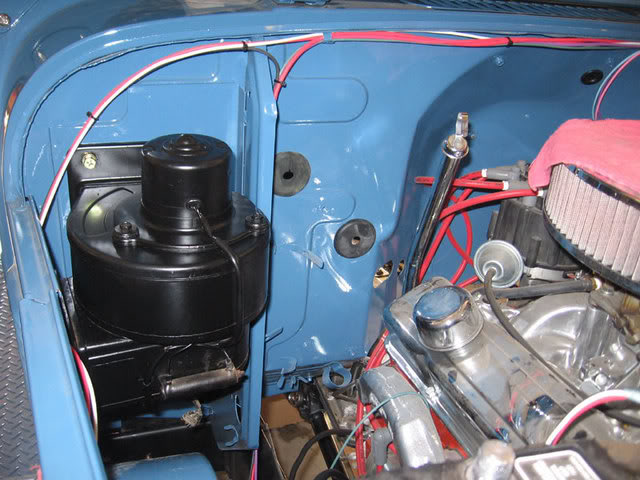 | |
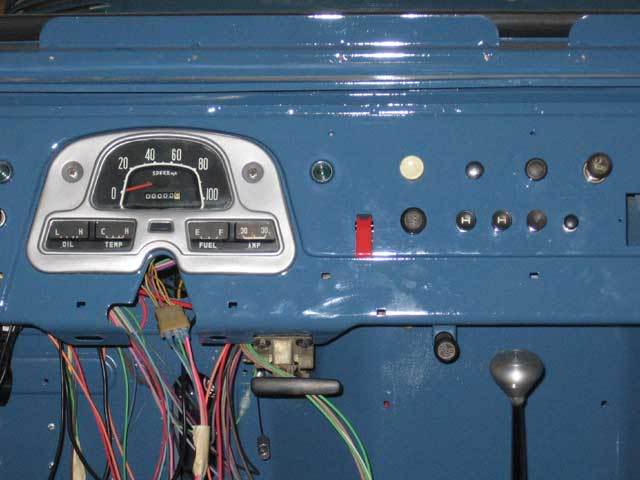
| at that point, all i had left to wire was the dash. i got the ignition switch wired up first, in anticipation of actually starting the engine again soon. i had previously disassembled and cleaned up the instrument panel, although the speedometer did not work. my dad found me a working replacement, so i swapped them out and re-assembled my instrument cluster. i got it all wired in so that i could use the gauges when i got the engine running again. i also wired up the light switch and the dimmer switch while i was at it. i still have to wire up the remaining dash knobs, but it should go pretty quickly. | 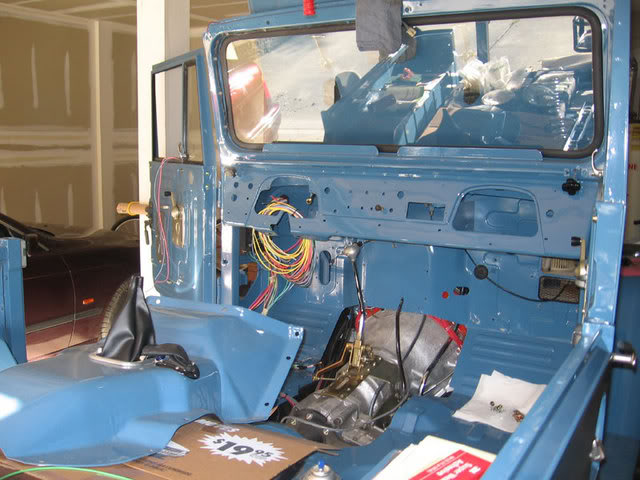 | |
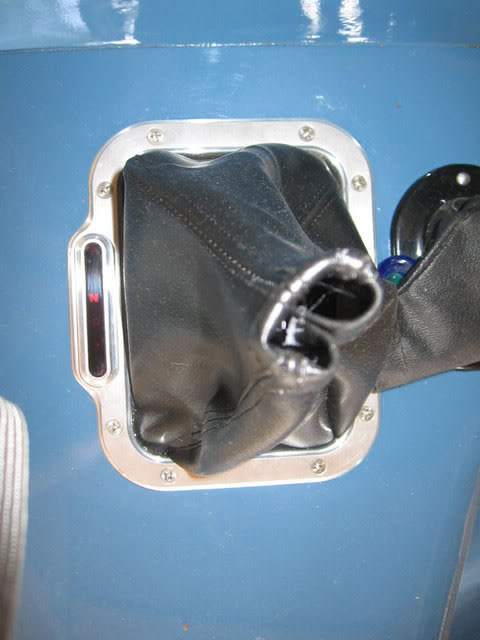
| with the wiring started, i decided to do another project that i had been wanting to get done. i mounted the transmission indicator/shift boot and got it all wired up. it is also wired into the neutral safety switch, which i mounted on the firewall. it was exciting to be able to turn the key and have the indicator light up, as if the vehicle were actually able to do something on its own. | 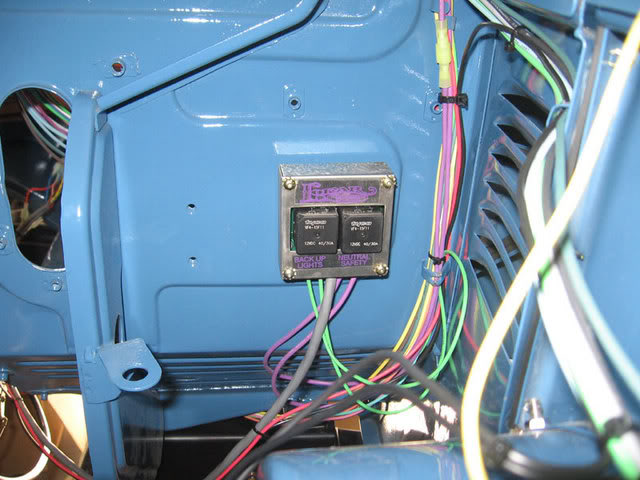 | |
 | ||
| hopefully the momentum will continue and the next post will see me starting the engine and finishing up the wiring. then i have to run the brake lines and get the steering components all welded up, but that is pretty much it other than some final assembly. |