Wednesday, July 18, 2007
not quite done yet, but...
got a few more little things wrapped up, including the accelerator pedal, gas tank, and new electric fan mount.
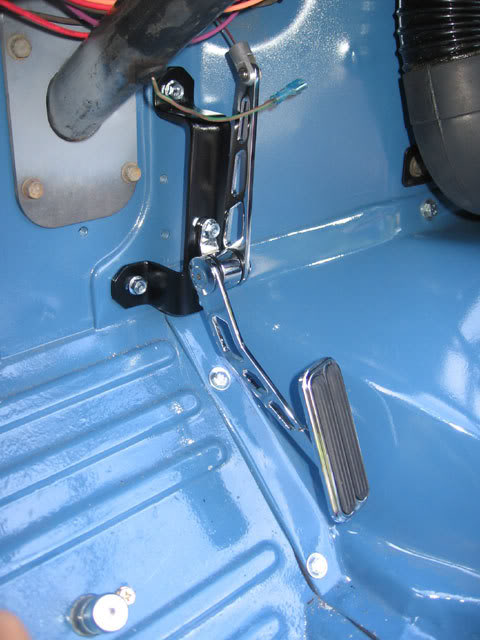
here is the gas pedal installed. after this picture was taken i also put a little rubber bumper between the mount and the pedal arm so there wont be any metal-to-metal contact
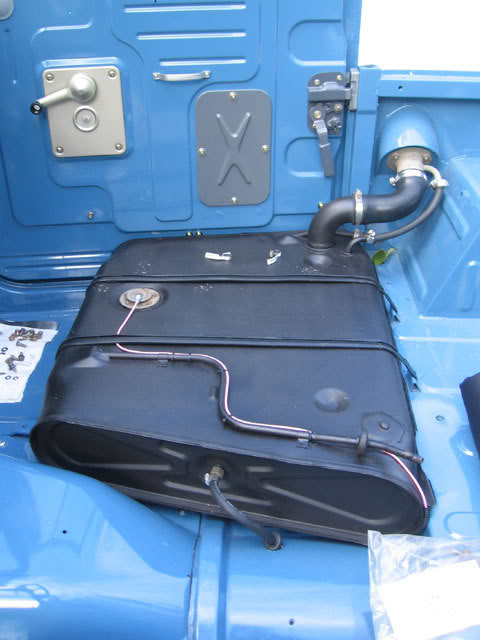
to clean out the gas tank, i put some gravel pieces in it with a small amount of gas and shook it around until my arms were tired. a trick i learned was to count out the number of pieces of gravel you put in so that you know how many you have to fish back out. once the inside was cleaned out, i cleaned up the outside and gave it a new coat of black spray paint.
after seeing all of the crud that was in my heater core and hoses, i knew my cooling system was really rusty inside. each time i have ran the engine, it has gotten pretty hot and started spewing out antifreeze, so i finally decided to break down and just get a new radiator. i got an oversized aluminum model (pictures of that to come) that came with a pretty slick mounting system. however, i had to figure out how to mount the taurus electric fan to the new system.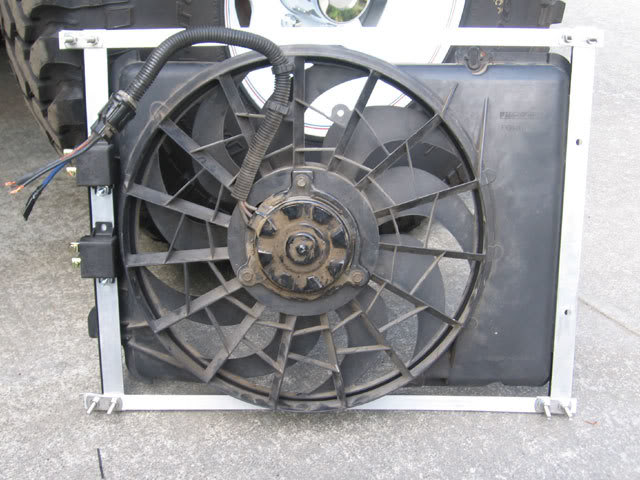
i created an aluminum frame out of some aluminum flat stock and angle stock. since the fan is actually molded at a bit of an angle, i was able to offset one side enough so that the whole fan fit flush next to the radiator.
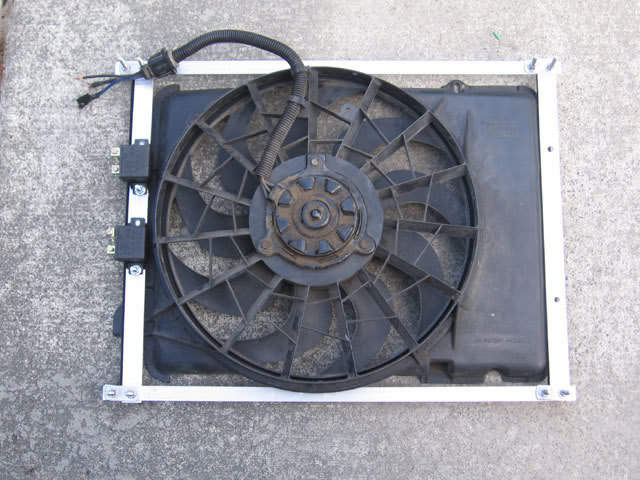
i was also able to mount my high and low speed fan relays to the frame
when the aluminum frame was complete and the fan was mounted to it, i used some small u-bolts to mount the frame to the round bar used in the radiator support. since the round bar slides over the threaded rods that are the actual support arms, i can easily slide the whole fan/mount system on and off without removing the radiator (and i can also remove the radiator without removing the fan).
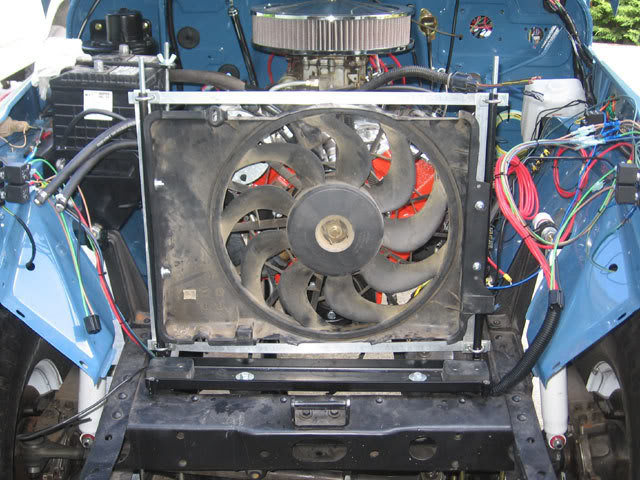
since i had originally moved my old radiator forward about two inches for clearance, i mounted the new radiator in the same modified position. in position, with the new fan mount, i actually ended up with a tiny bit more clearance between the fan and the water pump as well.
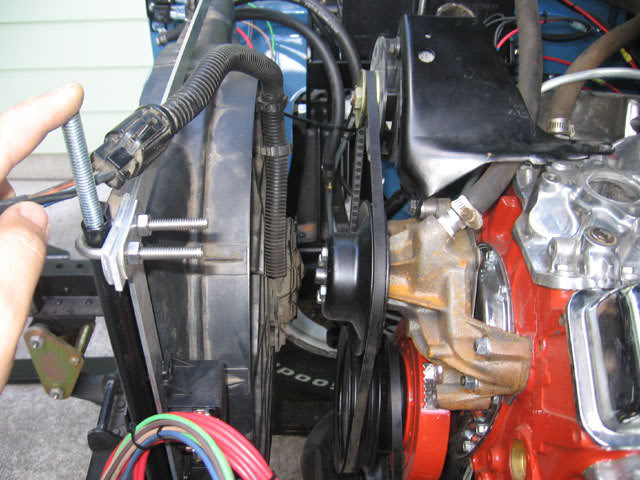
next up will be installing the radiator (including upper support arms, new hoses, and the transmission cooler lines).

here is the gas pedal installed. after this picture was taken i also put a little rubber bumper between the mount and the pedal arm so there wont be any metal-to-metal contact

to clean out the gas tank, i put some gravel pieces in it with a small amount of gas and shook it around until my arms were tired. a trick i learned was to count out the number of pieces of gravel you put in so that you know how many you have to fish back out. once the inside was cleaned out, i cleaned up the outside and gave it a new coat of black spray paint.
after seeing all of the crud that was in my heater core and hoses, i knew my cooling system was really rusty inside. each time i have ran the engine, it has gotten pretty hot and started spewing out antifreeze, so i finally decided to break down and just get a new radiator. i got an oversized aluminum model (pictures of that to come) that came with a pretty slick mounting system. however, i had to figure out how to mount the taurus electric fan to the new system.

i created an aluminum frame out of some aluminum flat stock and angle stock. since the fan is actually molded at a bit of an angle, i was able to offset one side enough so that the whole fan fit flush next to the radiator.

i was also able to mount my high and low speed fan relays to the frame
when the aluminum frame was complete and the fan was mounted to it, i used some small u-bolts to mount the frame to the round bar used in the radiator support. since the round bar slides over the threaded rods that are the actual support arms, i can easily slide the whole fan/mount system on and off without removing the radiator (and i can also remove the radiator without removing the fan).

since i had originally moved my old radiator forward about two inches for clearance, i mounted the new radiator in the same modified position. in position, with the new fan mount, i actually ended up with a tiny bit more clearance between the fan and the water pump as well.

next up will be installing the radiator (including upper support arms, new hoses, and the transmission cooler lines).
Comments:
<< Home
Is there by chance you can post where you got your gas pedal and the bracket that holds the gas pedal. I have been looking for one it looks like you have the perfect setup. Thanks.
For anyone that's still looking for it, or future visitors to this blog, the gas pedal shown is a Lokar unit, and the bracket is designed and sold by BTB Products. You can buy the pedal there as well.... https://btbprod.com/product/throttle-pedal-steel-universal-chrome-lokar/
Post a Comment
<< Home

